
info@sikkasoftware.com
How to configure Sikka Platform Utility for QuickBooks
á
á
á
á
á
á
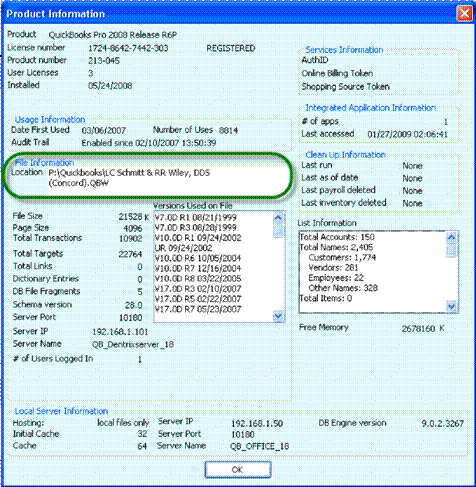
To verify QuickBooks company data file path, perform these steps: á
Go to QuickBooks and press [Ctrl + Shift + 1]
Product Information window will be appear as show:
á
Review File Information and use same QuickBooks data file to configure with Sikka Platform Utility
Through Options you can set QuickBooks data file path.
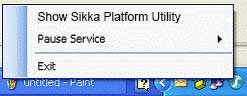
1.áááááá Go to System Tray and locate Sikka Platform Utility Icon. Right click icon and click Show Sikka Platform Utility option.
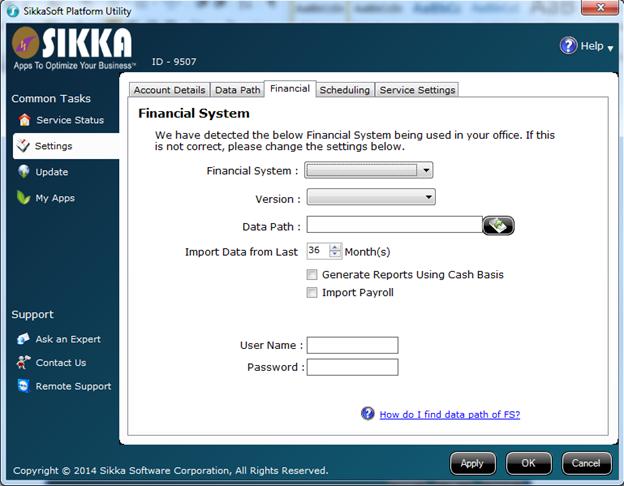
Click Data Paths category in the list on the left panel.
á
2.áááááá Click Financial tab page.
á
3.áááááá Select Financial System ôQuickBooksö from the drop down list.
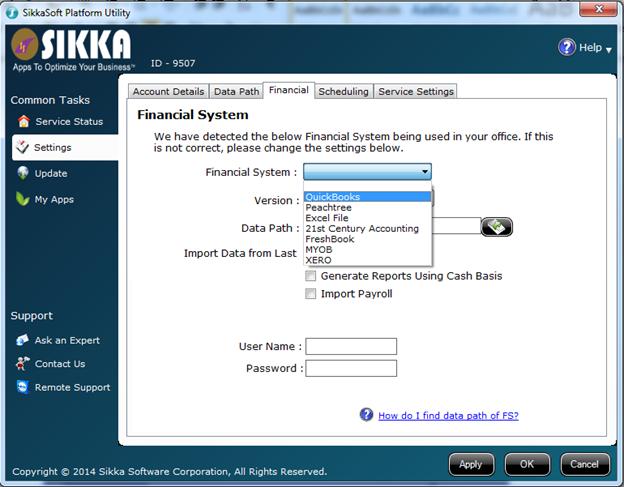
Please note QuickBooks basic does not support auto read option.
Select your QuickBooks data file path.
Select QuickBooks version from the drop down list.
á
4.áááááá Enter QuickBooks Admin user name and password. It is recommended to input these fields. This will help to troubleshoot technical support tickets. Password field is strongly encrypted.

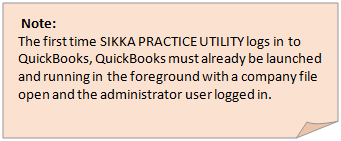
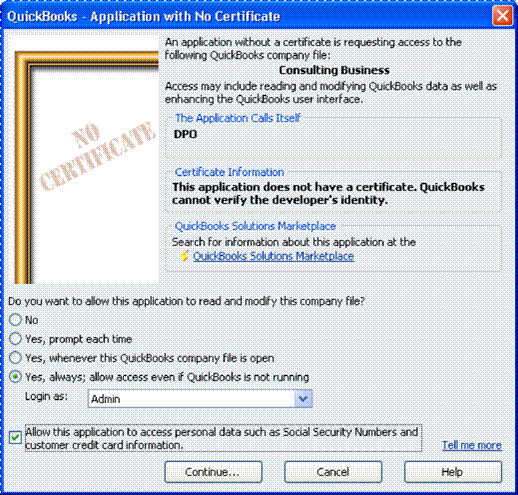
Note: The authorization dialog appears when Sikka Platform Utility tries to access a QuickBooks company file for the first time.á
á
á
The Default Authorization Dialog
Authorize the application to log on in unattended mode (auto login) by selecting ôYes, allow access even if QuickBooks is not running.ö
Àáááááááá If the user selects unattended mode authorization and if there is more than one user (not just the administrative user) then the ôlogin asö dropdown is visible and enabled, presenting the user with a list of login IDs currently able to log in to that company file. ÏSelect Admin User. (Mandatory)
a.ááááá The checkbox at the bottom of the authorization dialog, if checked, authorizes Sikka Platform Utility to access personal data. (Mandatory)

On successful connection Click on save button to save data.
Click Close button to exit window. á
You have successfully configured QuickBooks data file with Sikka Platform Utility.
Copyrights ® 2014 Sikka Software Corporation. All Rights Reserved.